Application of geographic location and event logging.
The following information is about the new version of Telesima's online tracking application.
It gives you instructions on how to use it and analyzes the features of the app to make it as user friendly and functional as possible.
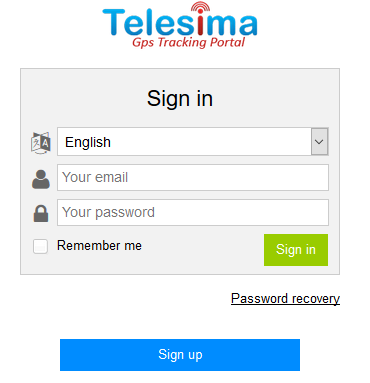
Entering now is only possible by filling in your email and password.
If you are already user, you should click on the link "Password recovery" and in the next form fill in the email address you already have.
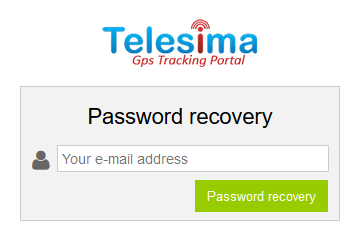
Fill in your email and press the password reset button to send you a link to your email address where it will allow you to register your new password.
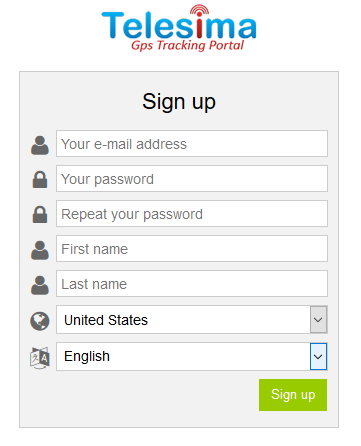
Click the button Sign up and fill in the necessary information for your new registration.
After this step you should check your email where a confirmation link will be sent to complete your registration..
There are cases where the above email may be sent to a junk mailbox..
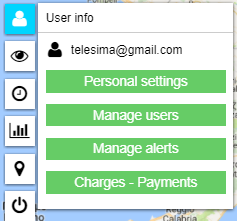
This includes settings for users, their devices, and information for completing payments.
Below you see all the options.
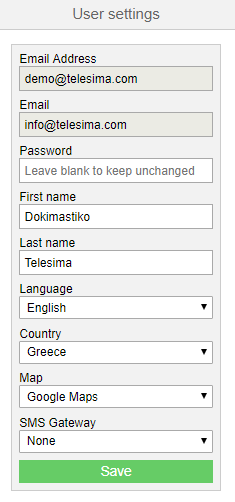
Changes to your account information such as name, password, language, map and activation of sms messaging gateway.
The platform is compatible with the company smsapi.com which allows you to send notification messages from the Telesima platform via a token key that you fill in the last field.
* Your email address can not be changed after you activate your account.
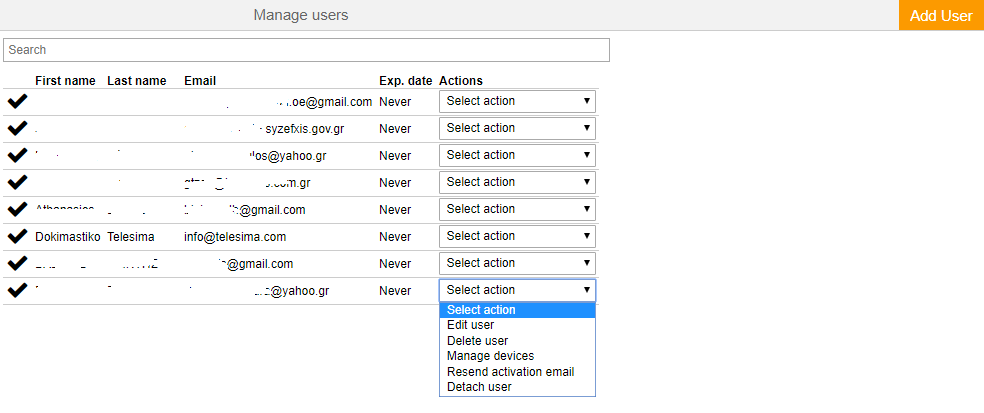
On this screen you see all users as you create a new one.
You also have the ability to edit their data,to add devices to them, delete them, as well as unlink them from your account.
When completing creating a new user, you must select the action Password to send the new user via email a link to allow him to enter his password and activate his account.
All your users do not receive debit payments and are not informed of the charges for devices connected to them.
* Disconnecting a user stops the payment obligation from you as well as accessing the devices connected to it.

View, edit, and create a new alert.

A new alert is created after you have selected the device, the type, the zone, the frequency of sending the time period, and how it will be (email-sms).
In case of sending via sms, the phone number should contain the country code eg Greece 003069XXXXXXXX.
* See section (Geographical Zones) for details on how to create zones.
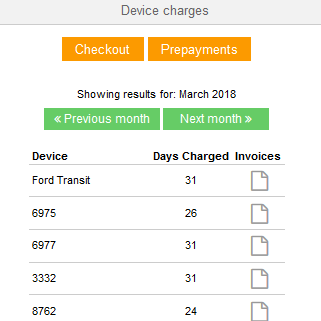
This screen allows you to view the daily charges of your devices as in the previous months.
You can also see all the bills created for each device in detail.
With the button Checkout you will sign in to your debit panel to view or complete your payments and with Add credits you will create a new payment with the amount you wish to repay your future charges.

Select the number of credits you wish and, if you have more than one device, fill in their number to see how long you are covered.
Discount applies from 365 credits or more.

At this point you can see your devices on the map, create groups as well as add a new one or edit what you have.
They appear in the list with a different color that tells you the time the device has to communicate with the platform.
For example, if the device has been sending data for more than one hour then it will change from green to red.
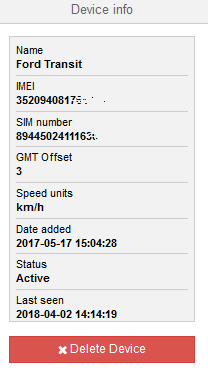
Click on the icon (i) on the previous screen you will see information about your device such as imei / id, date of addition, last seen, time zone and status.
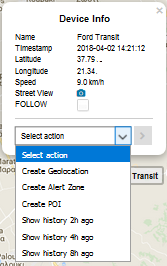
Clicking on the device icon on the map will show some useful information that tells the position, time and speed of the device if it is moving.
In case the color of the device moves it will be green, while if it is parked, the color will be blue.
Click the icon next to it Street view you will see the point of your device through the Google Street maps while checking it Follow your device will remain in the center of the map if it is moving.
Also below are some very useful actions you can choose to instantly create a new zone, new alert, or directly view the recent 2,4 and 8 hour track history for the specific spot where your device is located.
* The recent history options take into account the date and time indicated on the screen, rather than the current time that the action is being performed.

At this point you can search for your devices, edit, delete and add a new device.
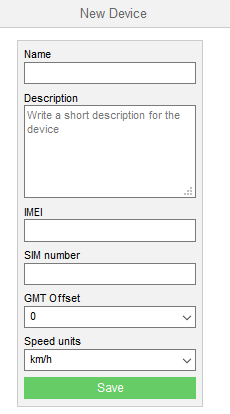
Fill in a name for your device, the imei / id number, the time zone, and how it will be calculated speed
The field indicating the sim number is optional and does not affect the operation of the device.
Once the process has been completed and you have made the necessary settings on your device so that it can send data to the Telesima servers after three minutes, your device should appear on the map.
If this does not happen check the list Supported Devices that your device is supported and you have chosen the correct Port as well as the state of its sim card.
* Beware, there are some devices that do not send imei but the device id. In this case, you should know this and fill in the field with this number.


This allows you to group your devices by type, category, and per user to help you sort and generate bulk reports.
Show on map indicates that the devices in that group will appear on the map or not.
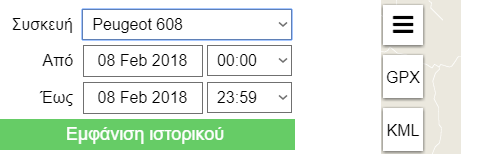
Through the history you can see the routes of your devices for specific periods of time you have chosen.
You can also export these routes to gpx, kml to save or edit them from other applications.
* The selected period must not exceed 3 consecutive days.
For example, if you want to see the route of a device one month ago at 2 then you should choose from 02 to 02 or the maximum from 01 to 03.
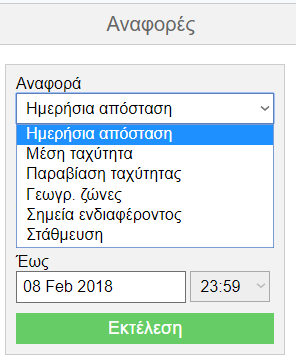
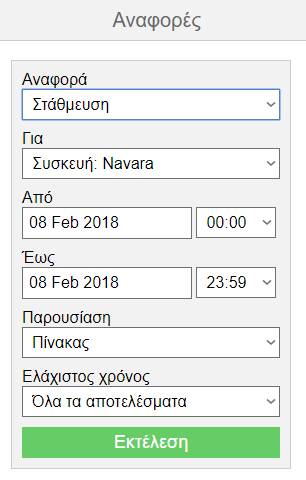
Your reports show useful information about how your devices work and export them to pdf.
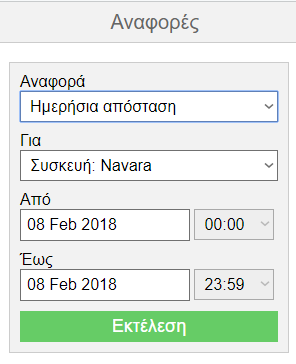
This report allows you to see the daily distances that your devices or groups have traveled in the time period you have chosen.
* The selected period must not exceed 31 consecutive days.
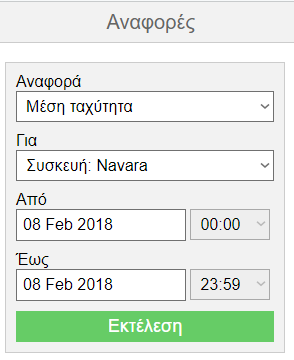
In this report, you have information about the average and maximum speed, the distance, the time it took for it, and the start and end time per day for each device or group you have selected.
* The selected period must not exceed 31 consecutive days.

By selecting the device or the group and the speed limit you want you can see the results with the point where the violation occurred in a table or on the map.
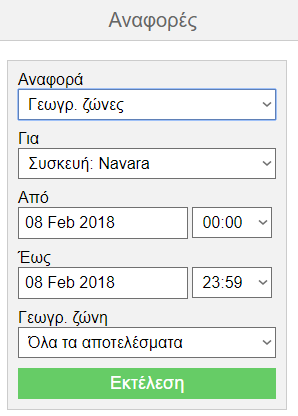
With geographic zones, you see the visits or absences that your devices or groups have made from specific geographic locations in the time period you have chosen.
This report is similar to the previous one, but it shows you results on the map according to the category you have created and the time intervals that will change the color of the points.
The results are displayed visually on the map and are very useful for a large number of points.
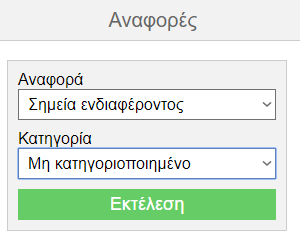
It shows you the places where the most recent and previous visit of devices connected to them and with briquette the time their color changes.
* For a complete understanding of how this report works, see the paragraph below for creating points of interest.
Here you can see the points and times of parking your appliances and your teams with in the time period and time you have chosen.
You have the option to view the results in a table or on the map.
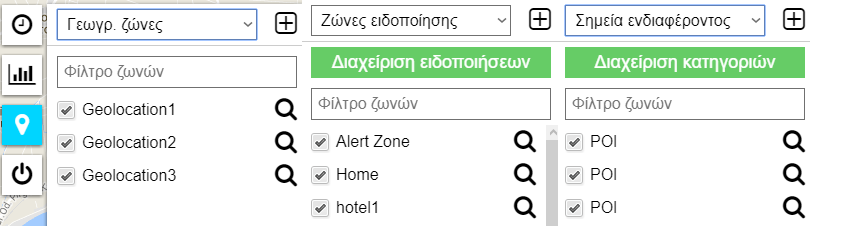
Zones are points selected on the map and divided into three different species which are then used differently by the platform.
With geographic zones, created reports, with notification zones instant alerts via email or sms and with points of interest also created special reports.
Add a new zone by tapping the (+) icon and then on a map point for each item or by selecting the action on each device as mentioned in the previous paragraph.
As you see in the above images for you can select each type.
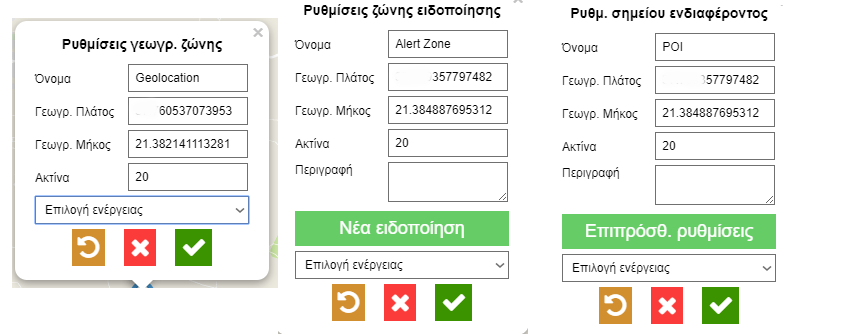
For geographic, you will need to fill in the name and radius which is a value in meters and indicates the circular size of the distance from the point you have marked on the map.
This zone is then accessible for creating the geographic zone references.
In the middle image you see creating an alert zone that after you create you can directly press the new alert button to create a new that will include this point.
Similarly, the same procedure applies to points of interest, but here you can create accusations and make additional settings for these points.
* In all cases, you have the option to convert any zone into a different type by selecting action.
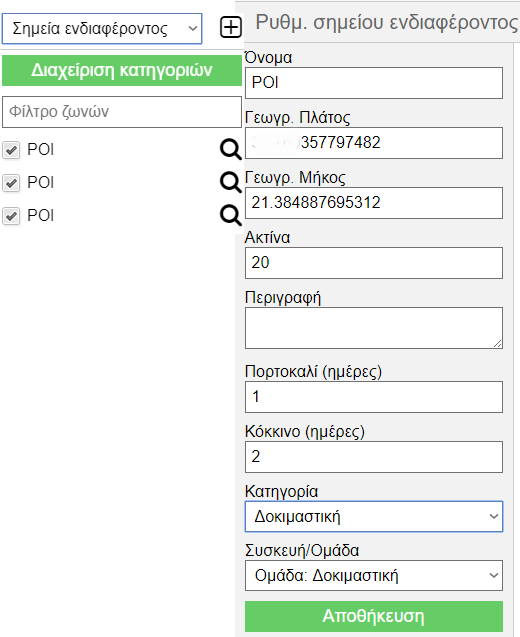
First we choose to create a new category and this will include the devices that interest us.
Once the point has been marked, we select additional settings and we see the above screen.
In the Orange fields, we declare how many days the point will get this color if the point does not hit the device, and the Red field indicates how many days the point will take color if there is also no device visit.
Below we state in which category this point belongs and after the device or group we want to follow.
The result of this process is shown in this report and shows us the points on the map with different colors and information about the name of the devices, the time and date of the last visits that have been made.
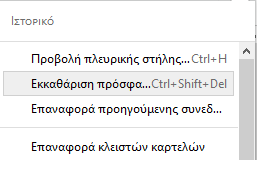
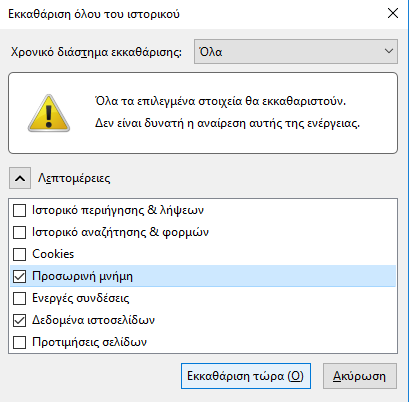
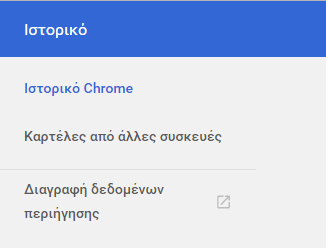
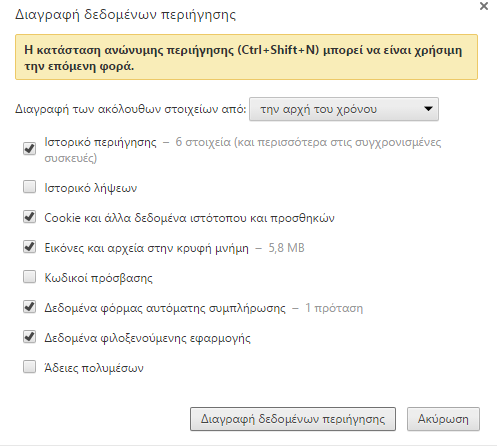
Troubleshoot problems that may occur when using the application.
If there is no automatic renewal of the position on a moving device, you need to clear the cache of the Browser you are using.